Soldering is a useful skill in this lab. In particular, to prevent your projects from turning into a Akira-like mass of wires, it’s good to put together cables with headers that can plug into breadboards, sensors, and Arduinos. This page will summarize some good soldering practices.
Quite a few students have learnt how to solder already. I’d ask them to read this through, because a lot of people who learn to solder don’t learn to do it properly. At least make sure you read the part on how to keep the soldering iron clean, it’s super-annoying when somebody comes in talking up how they already know how to solder and then they leave the soldering iron covered in grime.
The Five Principles of Soldering
Don’t touch the hot part
It looks like a pen, and it feels like you should hold it like a pen. Don’t. Trust me on this.
Adhesion and cohesion
Solder sticks very well to itself. It also sticks very well to metals with high heat conductivity like copper and tin and whatever the soldering iron tip is made of. The basis of soldering is getting the molten metal to stick to where it’s supposed to.
Heat transfer
Solder sticks to hot metal. This is why it’s hard to solder metals like Nichrome and stainless steel: they have high heat resistance, so they don’t get hot enough for the solder to stick. Another problem arises when you have to solder a big chunk of metal. It’s hard to solder a heatsink because the heatsink does its job and sucks all the heat away from where you’re soldering. You can use flux and a high soldering iron temperature to help solder heatsinks. In circuit boards, the ground pin is often the hardest pin to solder, because it is connected to a large plane of copper that acts as a heatsink. Also, if the soldering iron tip is covered with crud it won’t transfer heat well and the solder won’t stick to it. The iron tip should be shiny like melted solder, and solder should stick very well to it and not ball up.
Flow
When you’re soldering you’re trying to get the solder to flow from one point to another. Solder usually has flux incorporated into the metal filament, which helps the solder to flow onto bare, unsoldered metals. When you touch solder to the soldering iron tip the flux starts burning off (that’s what produces the smoke). If all the flux burns off, the solder won’t stick well to what you’re soldering (unless you’re soldering onto a layer of solder, because, as you just read, “solder sticks very well to itself” even without flux). Therefore, you should do your best to apply solder to the target before the flux burns off. If this is impossible then you can use some extra flux compound to help out.
Use the fume fan, and wash your hands when you’re done
Flux, and the smoke it produces when it burns, is not good for you. The fume fan at the soldering station will pull the fumes away (and blow them towards the people on the other side of the room who hopefully won’t notice (the fan also has a filter)). When you finish soldering, your hands are covered in a horrible concoction made of lead, tin, acid and who-knows-what-else. Wash them before using them for anything else.
Before You Solder
Temperature
Normally you should set the soldering iron to around 300 to 350°C. If you’re soldering a heatsink, turn it all the way up to 480°C. If you’re doing surface mount soldering, turn it down to 250°C so as not to burn the part.
Cleaning
Please keep the soldering iron clean. It’s really hard to solder with a dirty tip. If the tip becomes dirty, here’s how you can clean it.
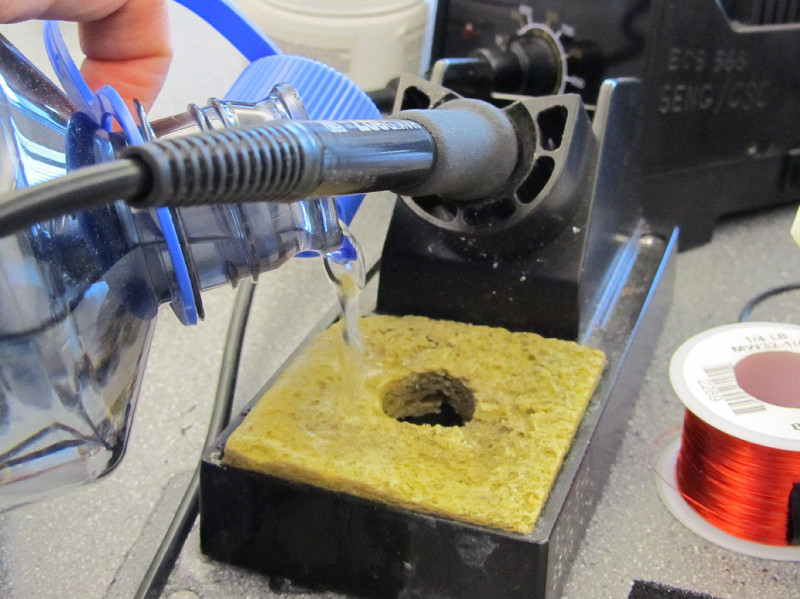 First, pour water on the sponge that’s on the soldering station until it’s soaked through. The sponge is used to wipe the solder iron tip clean, and the water a) prevents the sponge from burning, and b) cleans the tip as it turns into steam.
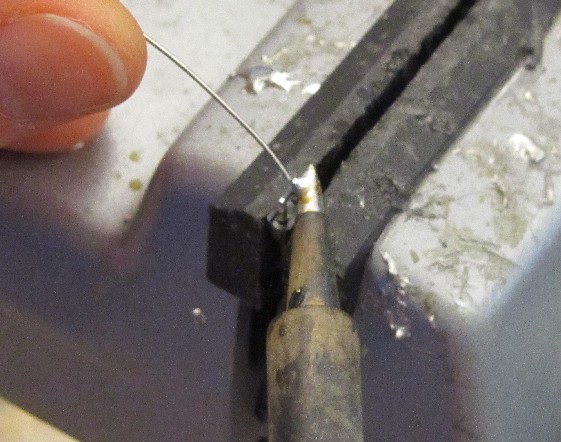
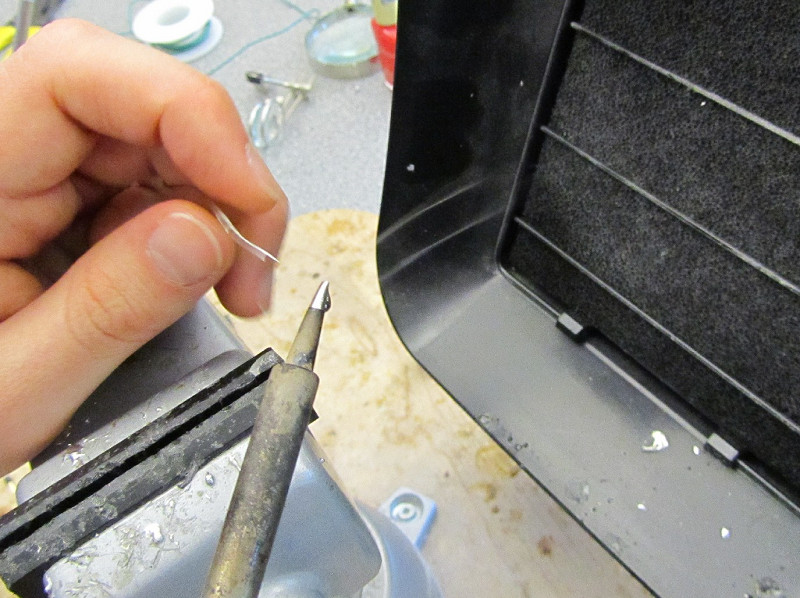 Melt a gob of solder onto the soldering iron tip and roll it around. It should stick well to the whole tip. Anywhere that it doesn’t stick is dirty. If necessary, you can turn the soldering iron up to its maximum temperature to burn off crud. That usually takes care of anything that doesn’t get washed off by the solder bath. (Note the colour of the tip in this photo; that’s what it looks like when it’s clean)
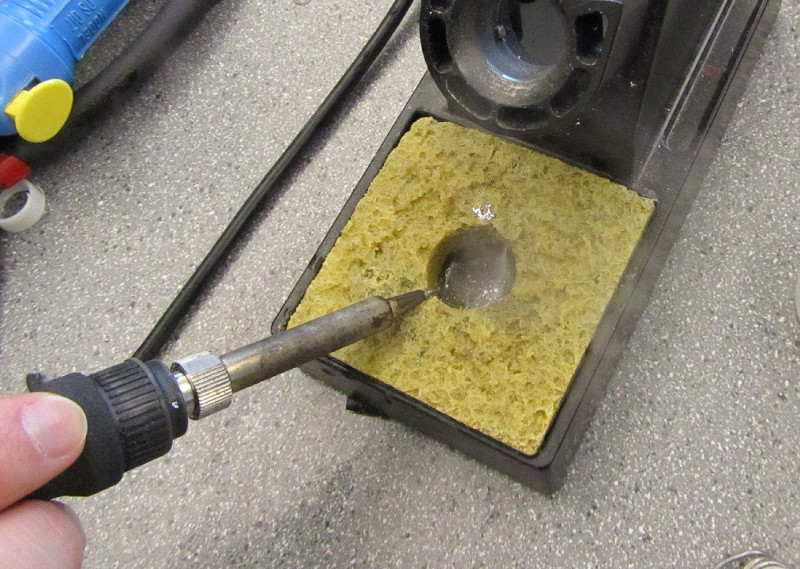 Finally, scrape ball of solder against the edge of the sponge to remove it from the tip. You just need to flick the tip along the rough surface, don’t press it hard into the sponge or it will cool the tip and burn stuff onto it.
Soldering
Pre-tinning
This is a very important technique. Recall two points from the principles of soldering:
- Solder sticks very well to itself
- Solder sticks best to other metals when it’s applied before the flux burns away
You pre-tin something by coating it in solder before you try to join it with whatever it’s supposed to be soldered to. Then you pre-tin the other object, so that both are coated in solder. Because you’re soldering just one object at a time it’s very easy to apply the solder directly to an object before the flux burns off. Once you’re done pre-tinning them the solder covering one object will stick very well to the soldering covering the other, so it’s easy to couple them together in a clean, strong joint.
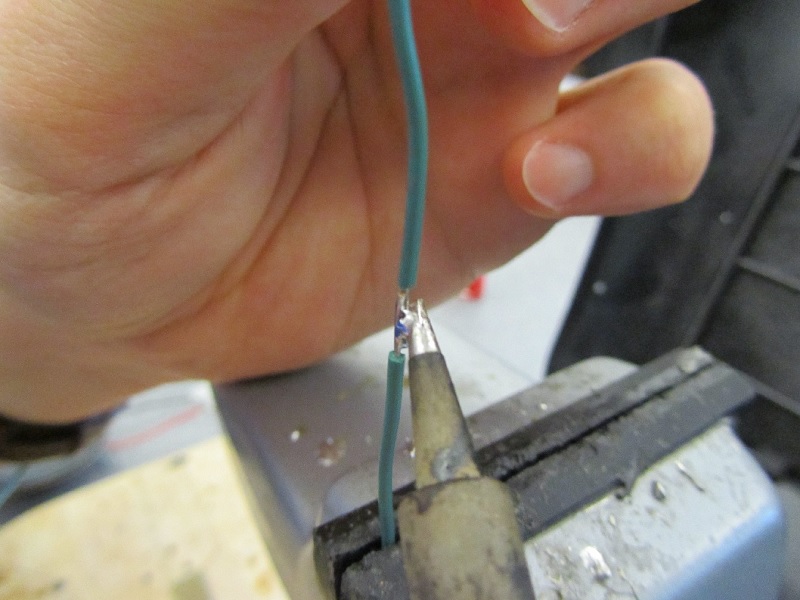
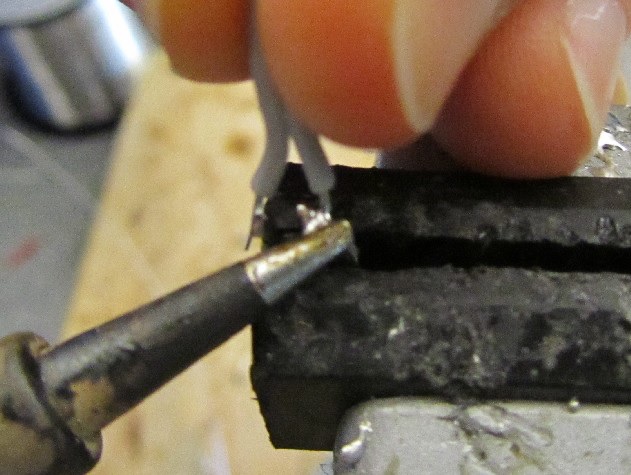
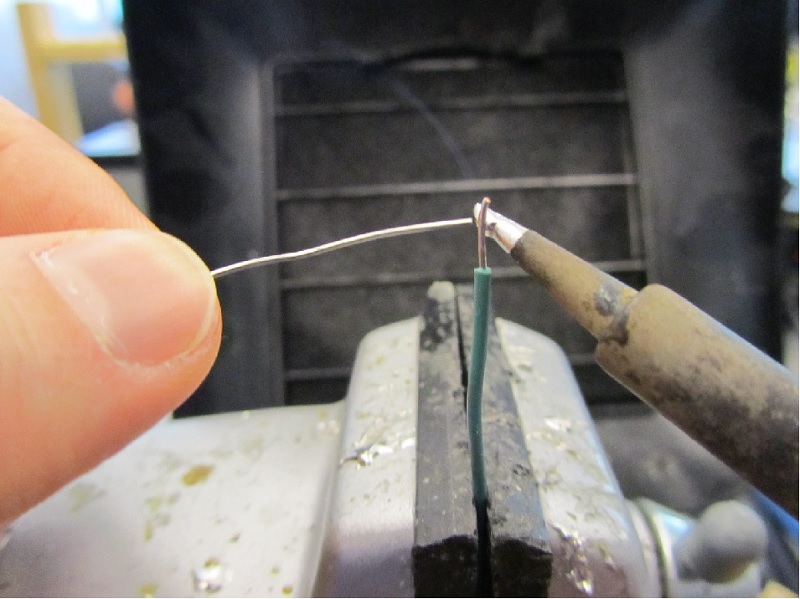 This photo shows pre-tinning a wire. The wire is held in a vice, leaving the hands free to hold the solder and the soldering iron. By bringing all three (wire, solder, iron) together at the same time, you can apply the solder directly to the wire without the flux burning off.
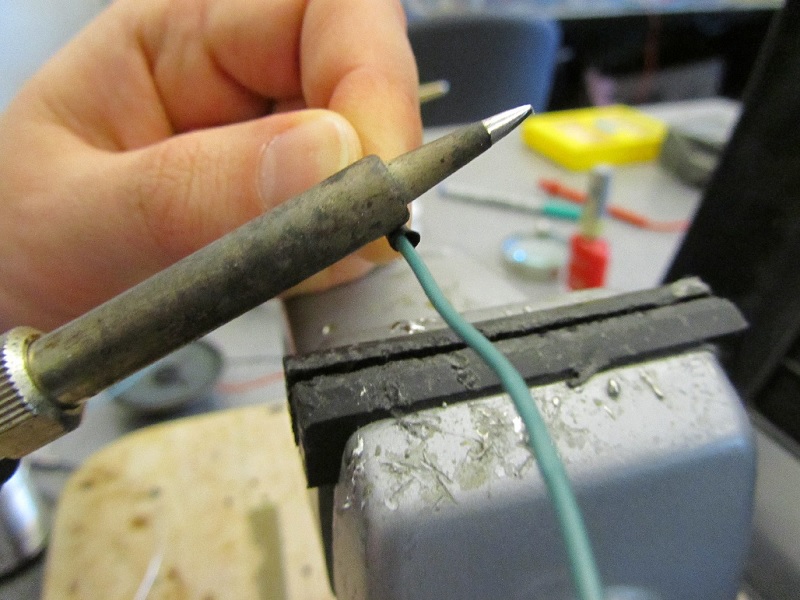
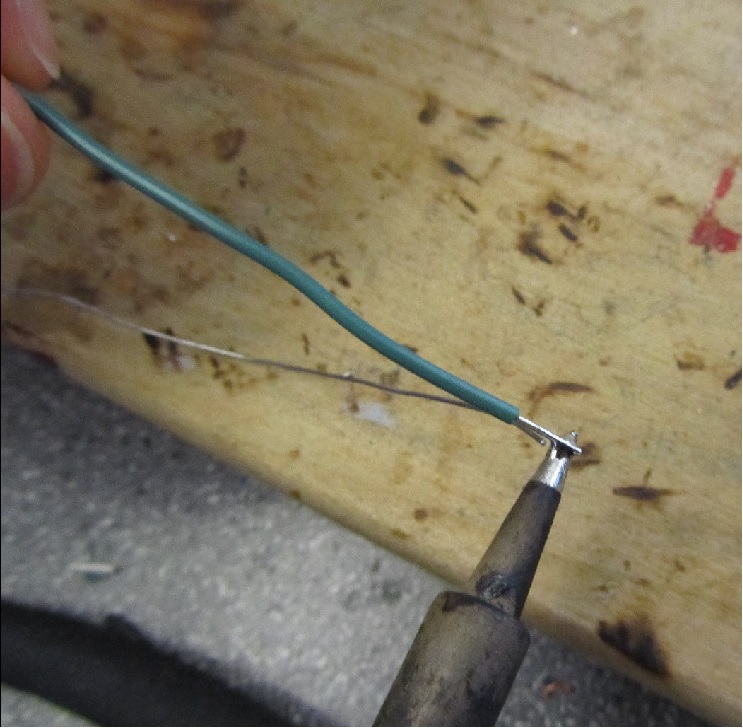 This is another technique for tinning a wire. Bend the solder up so that it’s hanging in mid-air, and hold onto the iron and the wire with your hands. If you’re gentle, you can tin the wire like this without having to put it in the vice.
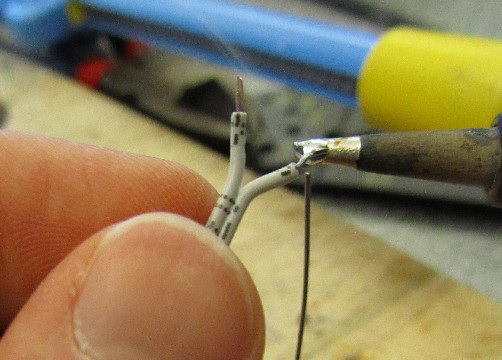
 Once the wires are tinned, line them up and touch them with a gob of solder. It doesn’t matter if the flux burns off of the gob, because the leads are tinned and solder sticks to solder even without flux. Observe that the wires in the photo are joined with a lot of surface area. This makes for a very strong connection.
Making a cable
Ribbon cable can be used to make a sturdy, organized connection between components in your system. Here’s how to solder together a cable made out of ribbon cable.
 Put a header with the correct number of pins into the vice.
 Pre-tin the header.
 Pre-tin the cable. Ribbon cable is usually stranded-core wire, which is pleasant to solder. The tiny strands really suck in the solder well. Stranded-core wire is also more resilient to bending than solid-core wire is.
 Finally, join the wires to the header pins.
After Soldering
Obviously solder joints are bare metal, and leaving them uncovered risks shorting out wires. You can avoid that risk by covering solder joins with something. The easiest is tape, which really sucks. It’s a trap! Don’t use tape, it’s messy, it comes loose too easily, and it looks shabby. You could also use hot-melt glue, which is a huge pain to remove if you ever decide to change the header. Normally you’d use heat-shrink tubing:
 Insert the wire into an appropriate length of heat-shrink tubing, then use the barrel of the soldering iron to shrink the tubing until it holds the wire tightly. Don’t use the iron’s tip, you’ll get burnt plastic all over it which is hard to clean off. If you’re making a cable with a header, you have to put the heat-shrink tubing on before soldering.