I did a bit of testing on my AUV hull design, and finally got a prototype ready to go. I’ve been working on the design for several months in Autodesk 123d, which is a pretty great program if you can put up with the crashes, corrupt save files, and slowness (hey, it’s beta).
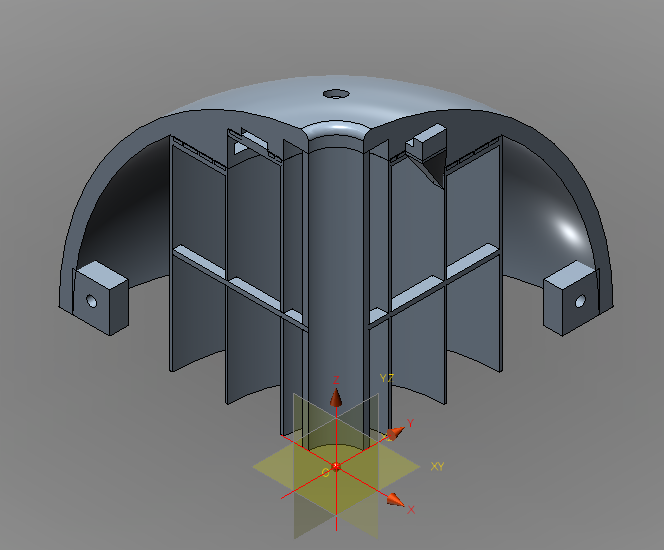
Here is my current design in full, including the support structures:
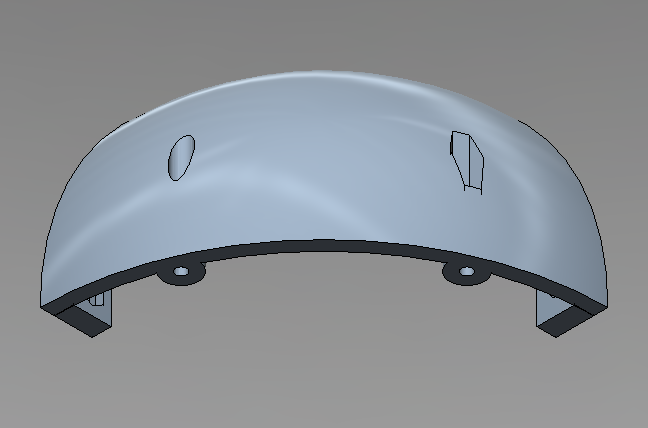
This is one eighth of the hull; I call it a semidemihemisphere. Eight of these will make a sphere 18 cm in diameter. I split it up into eighths because I’m using a Makerbot 3D printer and its build platform is limited to a cube about 10 cm to a side. Also, this way each piece can be identical (or nearly so).
One limitation in the Makerbot is that it can’t print overhangs very well, so I had to add some support structures that can be cut away. In this entry I will ignore that and focus on the hull design:
My design requirement was simple: I needed a large, spherical hull with a hole in the top and bottom for buoyancy control. As I said previously, in order to make it big enough I had to split the sphere into eighths. The eight pieces needed to be bolted together securely, but I wanted to avoid having a lot of nut and bolt holes on the outside of the hull. (You’ll see that there are several outer holes in the current design, but I have ideas to remove them all that I might implement in a future version of the hull).
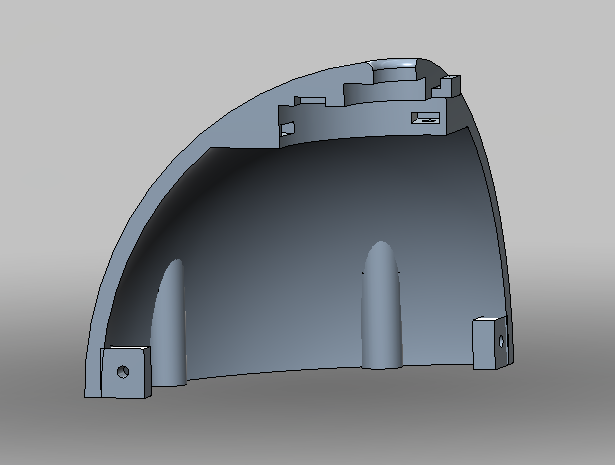
The sphere is composed of an upper hemisphere and a lower hemisphere, each consisting of four more-or-less identical pieces like this:
These two hemispheres are assembled using connectors inside the hull, and then the hemispheres are bolted together from outside the hull.
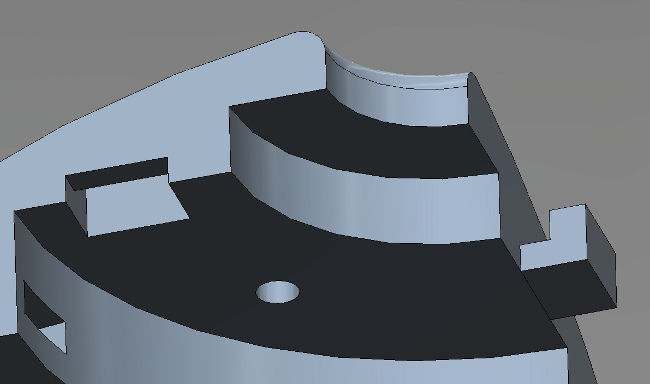
The upper assembly looks like this:
The tab on the right fits into the matching receptacle on the left to connect neighbouring pieces in a hemisphere. In my test prints of the upper part of the semidemihemisphere, two pieces snapped together quite securely. The circular hole in the middle fits a #4 bolt that will connect the valve to the top hemisphere. It will only be used on two of the semidemihemispheres; I’ll delete it from the model file for the other units so that I don’t have to plug it.
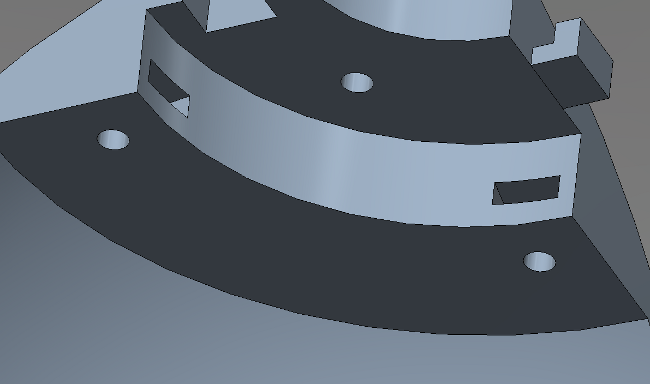
Just below the upper assembly you can see the inner component mounting points:
These can be used to mount components inside the AUV, e.g. a microcontroller or a sensor/control module board. The slots are sized to fit a #4 nut, so that the mounting board can be bolted on easily from below, without having to hold the nut (many of the nuts on the Makerbot itself are held in this manner). A mounting board will be bolted to one mounting point on two neighbouring semidemihemispheres, which will handily hold the semidemihemispheres together. It might be worth connecting neighbouring mounting points together even if nothing is mounted on them, just to reduce stress in the upper assembly tab.
The flat, right-angled circular protrusions inside the hull are actually an artifact of the support structure needed to print this thing on the Makerbot. This nod to the machine’s limitations turned out to be quite useful; I’m not sure what the best solution would be if I got this manufactured commercially.
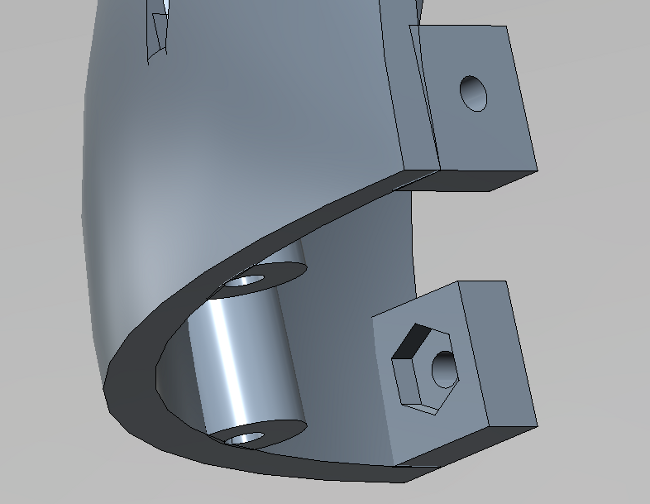
Down at the bottom of the hull you can see two more square connectors to join the lower parts of the four neighbouring units that make up a hemisphere:
One side has a hex nut inset, again so that the nut doesn’t need to be held when tightening the bolt. Two neighbouring semidemihemispheres can be joined at the bottom with a 1/2″ #4 bolt using these inner connectors.
Once the two hemispheres have been assembled, they are connected using the outer joins:
The left connector accepts a #4 bolt, and the right connector accepts a #4 nut. By matching one hemisphere’s bolt holes to the other’s nut holes, the two hemispheres can be joined together. This is obviously a major flaw in the outside of the hull. I currently plan to print plugs that can be inserted into holes to smooth out the hull surface. This is one thing I’d like to improve in the future, using a technique similar to the protruding tab in the upper assembly. I couldn’t use the same trick here because the bottom surface needs to be flat to sit on the Makerbot build platform while it prints, but a similar piece printed separately and glued in should be quite effective. I decided not to do that in this version of the hull, because I wanted to get the heck on with things and it’s not that important.
One problem is that when the semidemihemisphere is printed the bottom is not flat. It gets curled up, the bottom layer sticks to the raft interface, and so on. I currently plan to sand the bottom layer down and replace it with a cheap-o gasket made out of silicone rubber.
