I’m having trouble with the upper valve that will allow air to be released from the hull (thus decreasing buoyancy and giving some downward thrust). I mean, I’m having trouble with everything, but that’s why I’m doing this, right? Anyway, I decided to order a couple underwater solenoid valves in the hope that I could stick one in the robot and have it work (hahahahaha). I found several suppliers in China listed on this site alibaba.com, and settled on Nuoling Pneumatic. Most of the other options either weren’t waterproof, were too big, didn’t support a 12 V power supply, or had a large minimum order size. The two I bought were $12.35 each, which is less than I was expecting (although the shipping was $55 for two units).
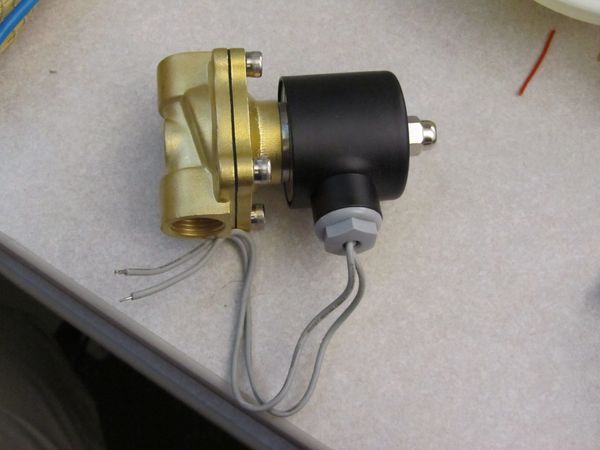
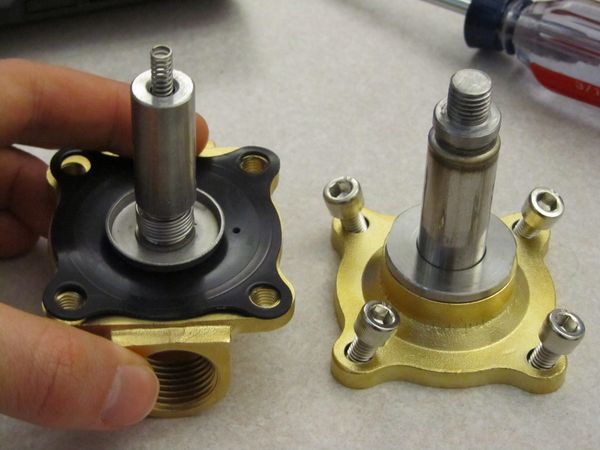
The valves were a lot bigger and heavier than I expected. You can see it’s basically a big chunk of brass connected to the waterproof electrical components. Fortunately it’s easy to take apart:
The valve assembly consists of three parts: the brass base; a rubber gasket connected to the spring-mounted iron solenoid core; and a metal sheath that encloses the core, bonded to the upper brass component. (The solenoid is mounted on the metal sheath.)
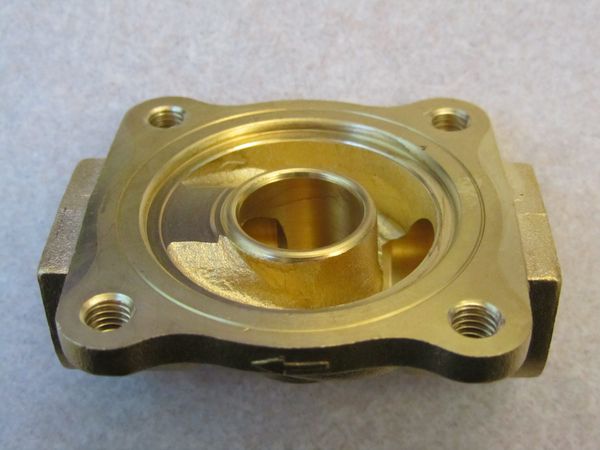
The above photo shows the structure inside the brass base. Notice the arrow indicating the expected direction of flow through the valve. The rubber gasket seals the inner aperture, and the pressure of the incoming fluid is dispersed around the perimeter of the large outer chamber so that it doesn’t push the gasket up. When the solenoid is activated it pulls the iron core up, which pulls the gasket away from the inner aperture. Fluid flows under the lifted gasket into the aperture until the solenoid is de-energized, at which time the iron core is released and the spring return pushes the gasket against the aperture’s lip to seal it back up.
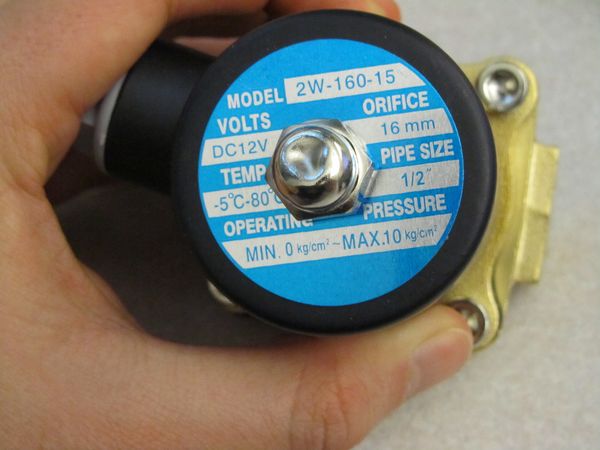
This label shows the valve’s specification, including the desired 12 V power supply. In fact, I tested with a fully charged 7.2 V Li-ion battery and it still actuated in air. The operating pressure label is a little disconcerting, as the datasheet the supplier sent me specified a working pressure of up to 500 kPa. A 0.10 kgf/cm^2 pressure corresponds to less than 10 kPa.
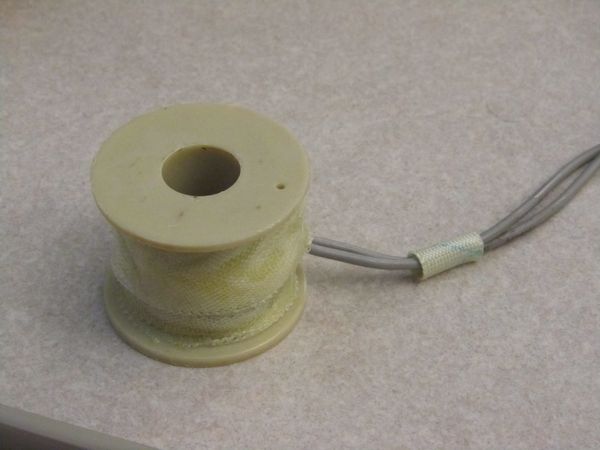
The solenoid is made of a copper winding connected to some nice, solid leads. The winding is coated in an encapsulant, which is a pretty thin layer of some kind of urethane-like material, and wrapped in a fabric mesh to hold everything together tightly. I haven’t tried it underwater yet, but this part (housed in the black casing in the photo at the top of this post) is exposed to the environment so I assume it’s actually waterproof.
This may turn out to be the most useful part of the valve. I don’t think I can justify putting all that brass and steel in my underwater robot, it’s just too heavy. By a happy coincidence, the valve I made previously fits perfectly inside this structure, so hopefully I can just mount this solenoid on my existing valve (or maybe an elongated version of the current valve. I tried, and my spring return is too strong–the compression spring on the solenoid’s iron core is surprisingly febrile–but this gives me hope that I can cut it down further and reduce the amount of force needed to pull the valve open.
One problem I foresee is that in my configuration, the transvalve pressure will be pushing the valve closed, so the deeper the robot, presumably the more force is needed to open the valve. It’s not a big deal, it will just limit the robot’s depth, which is better than making the robot unrecoverable. I’ll be happy if the stupid valve opens at all.
